Intro
Those who aren’t lucky enough to use VMware or Hyper-V in their infrastructure might find it painful to provide a seamless way to manage their virtual backup and recovery strategy (i.e Ovm, kvm..etc.).
Veeam turns out to be a solid alternative that might spare the pain of reinventing the wheel along with the hours of scripting that come with it.
Today we will demonstrate that with a software like Veeam, we can restore an Oracle Database vm as if it was a physical machine using its Bare Metal recovery feature on a dummy virtual machine.
Note that although the lab is based on VirtualBox, I have had a similar result when running it for OVM.
The following are the steps necessary to reproduce a simple DR test with VirtualBox vms (scripting free).
1. Windows server2012 prerequisites for Veeam
2. VM lab setup overview
- Veeam backup server
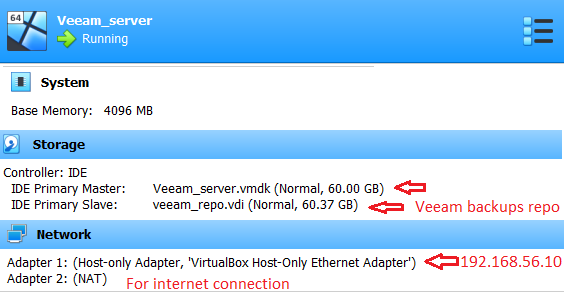 Veeam backup and replication server vm (192.168.56.10)
- Veeam Oracle target
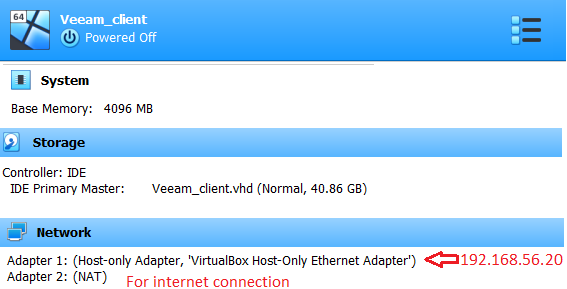
Virtual box oracle vm (192.168.56.20)

- Database: I chose a 12c multi-tenant database for this lab but it doesn't matter.
Oracle Database 12c Enterprise Edition Release 12.1.0.2.0
- 64bit Production
Database log mode              Archive Mode
   CON_ID CON_NAME                       OPEN MODE  RESTRICTED
---------- ------------------------------ ---------- ----------
         2 PDB$SEED                       READ ONLY  NO
         3 PDBORCL                        READ WRITE NO
Oracle Database 12c Enterprise Edition
3. Veeam backup server installation
Go to Top⭡
- Once subscribed for the 30 days trial, download the installer (iso) and mount in on your veeam_server vm

- Run the installer and specify windows builtin account as main veeam account.
Note : Windows 2012 R2 users will need to install the following update (KB2919355) as .NET Framework 4.7 is necessary. - Launch Veeam Backup and replication

Veeam backup and replication v10
4. Veeam agent deployment
Go to Top⭡
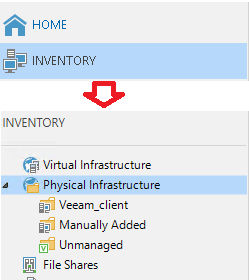
- Go to inventory section under Physical infrastructure folder and click Create protection group.
Create protection group
- Give the protection group a name.
 group name
- Choose individual computers as type of protection group.

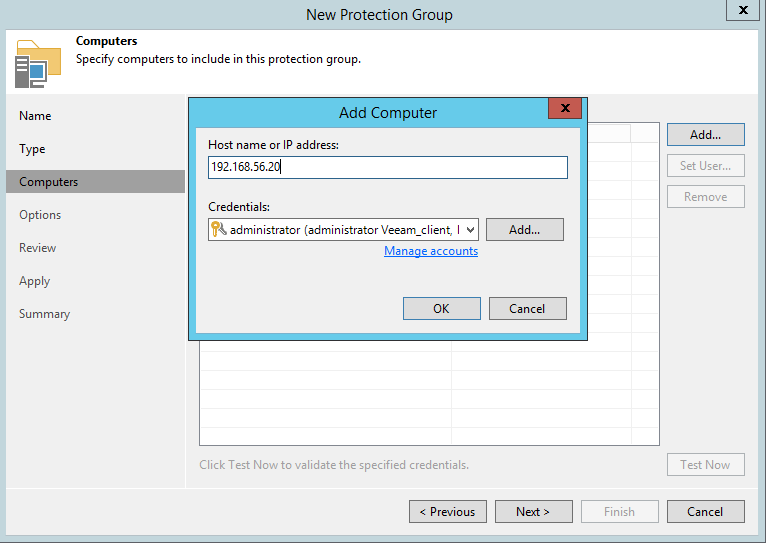
- Add the target vm you want to backup (IP address along with admin credentials)
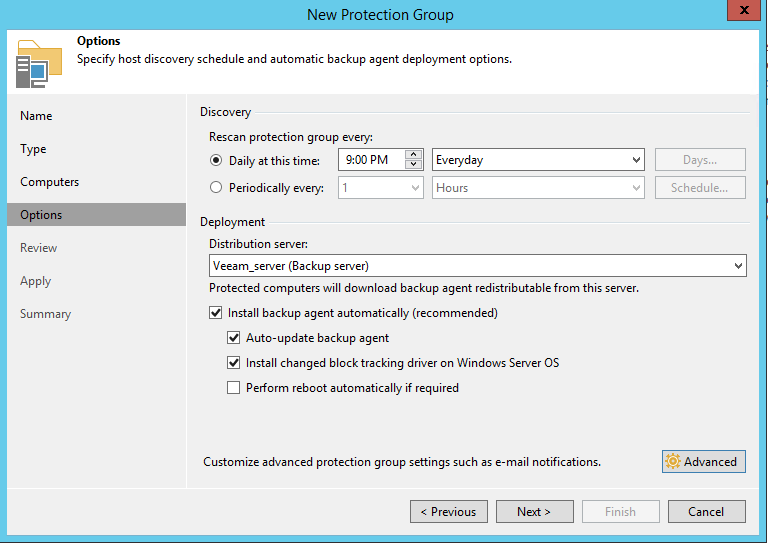
- The next segment is basically the options available for your agent deployment on the target computer and the daily schedule of agent check.
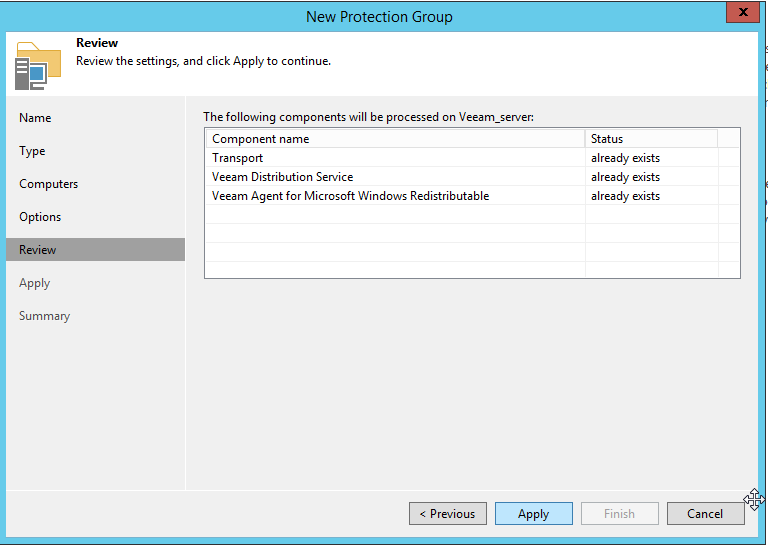
- Review and apply
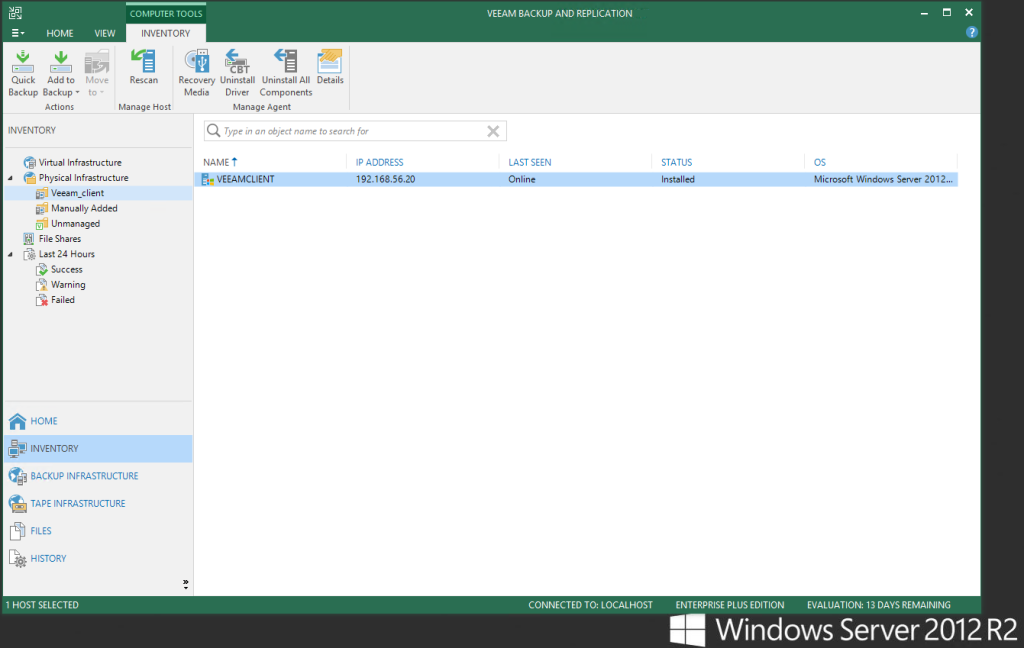
- Once the deployment is finished, close the window . The new group will be displayed in the inventory where you can click right to select details to check the agent info
- Details
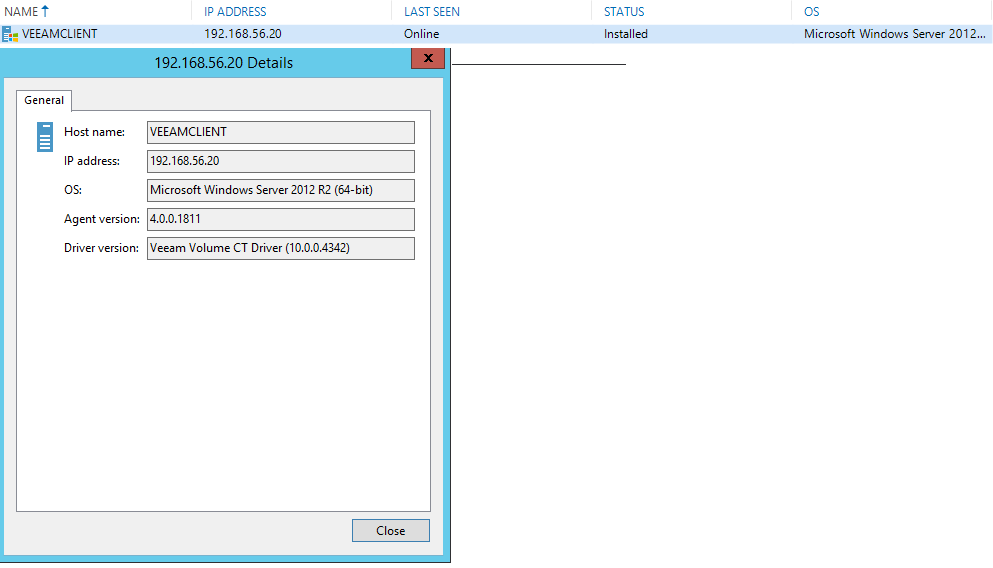 Client details
5. Agent Backup job creation (application aware)
Go to Top⭡
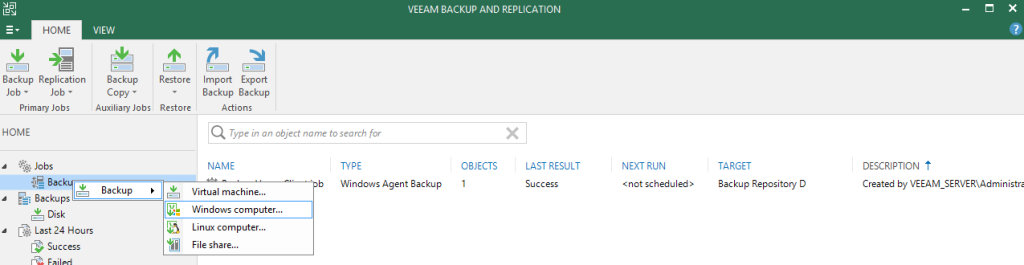
- Navigate to Home tab and select windows computer under jobs>Backups menu
- Select Server for the protected type and Managed by the backup server as backup management mod

Job Mode
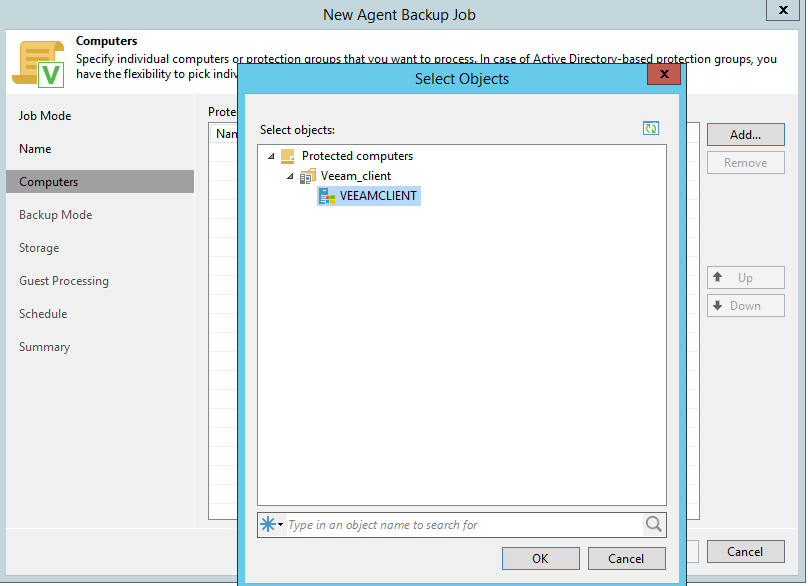
- On the computers sections add the computer we previously created
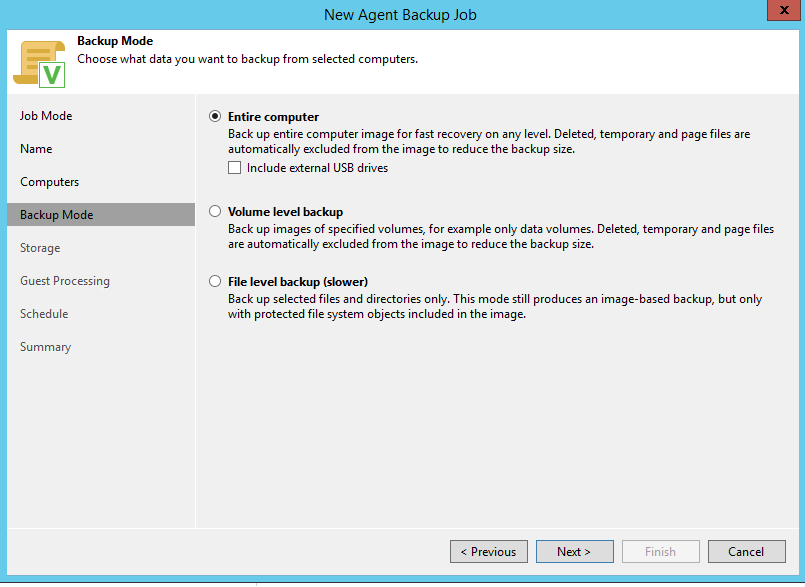
- Select Entire computer as backup type
- Select the backup repository that will store the backup

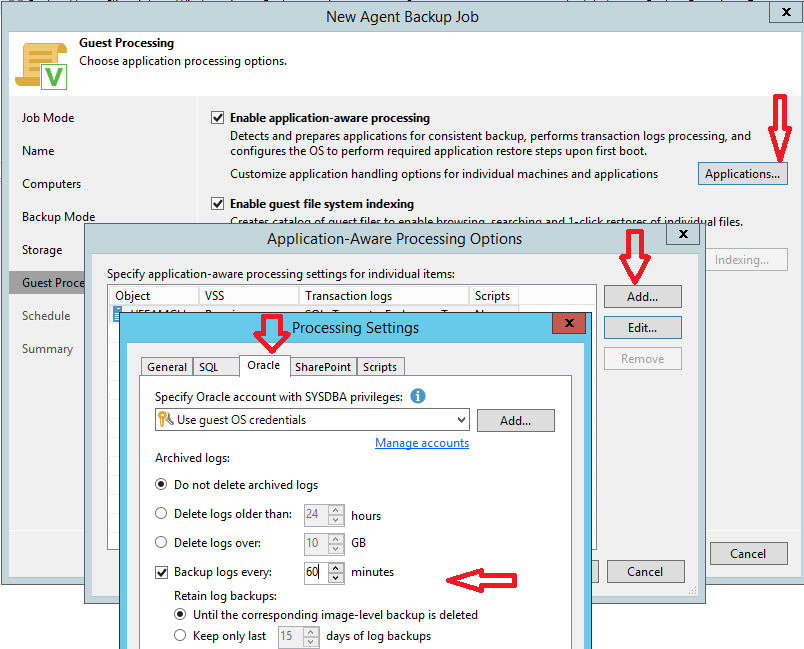
- In this section we will take advantage of the available Application Aware Processing options as we have an oracle database in the target server.
- Additional scheduling setting are provided before completing the job creation

6. Run a full backup
Go to Top⭡
START (synthetic) and ACTIVE FULL (active).

- Active Full backup gets the data from the target system and is always done the first time a backup is run.
- Synthetic Full backup gets its data from existing backups stored in the backup repository and changed files in the source vm to reduce CPU/Network overhead.

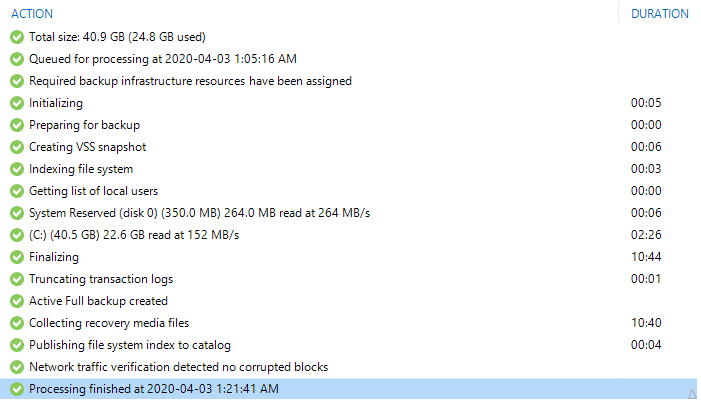
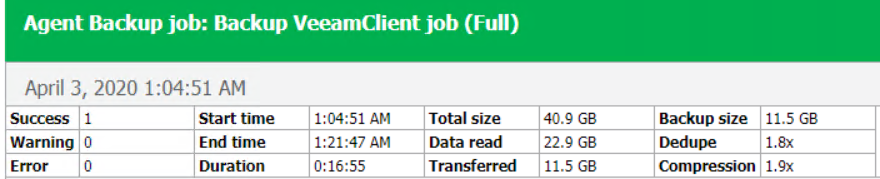
- Let’s have a closer look into the details of this job. Notice it only took 2 minutes to read 23GBs (probably because vms were in my laptop) while most of the work was consumed by recovery media files collection. These very files will be helping us to create the Veeam recovery media (sort of bootable recovery drive)
7. Create a Recovery media using agent backup
Go to Top⭡
- On the inventory click on the recovery media button under our protection group (Veeam_client)

- ISO is the default image file here
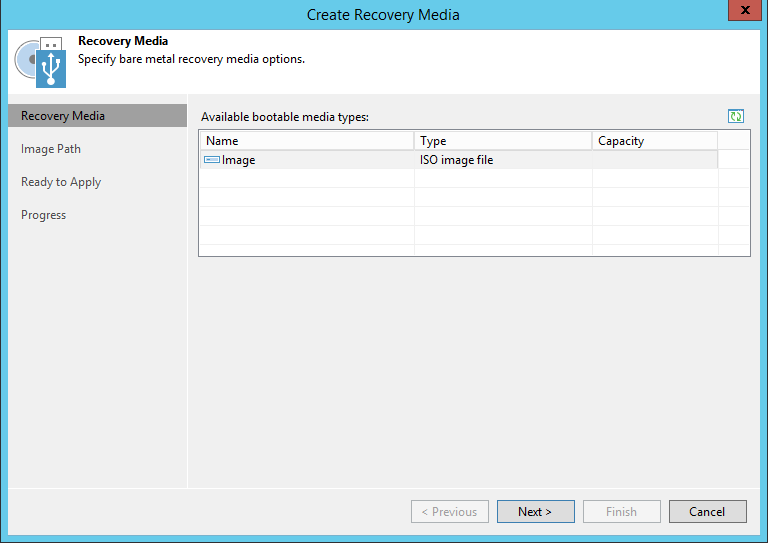
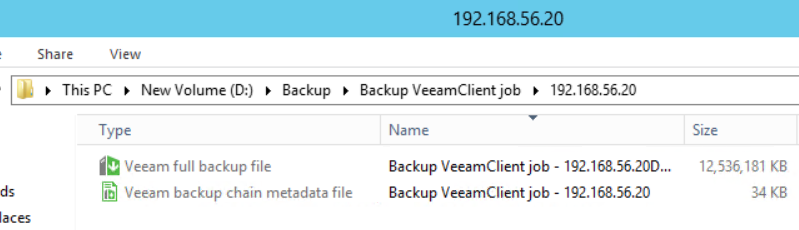
- Browse a location in the backup server (local drive)
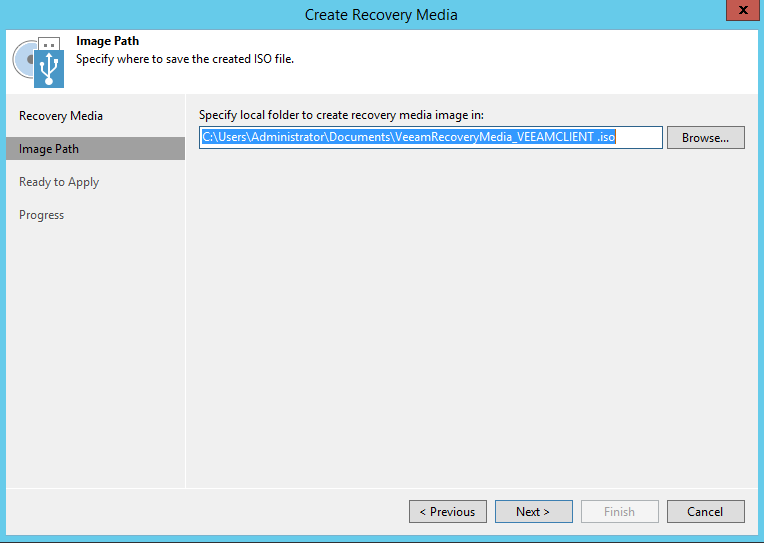
- Click next then finish

8. Proceed with a Bare Metal recovery
Go to Top⭡
To make it even safer we will not need to literally destroy the original vm but only switch it off to avoid IP overlap when booting the new machine.
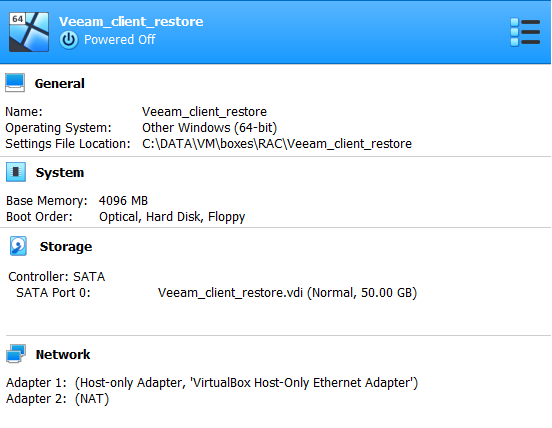
- Create a new shell virtual machine with the below specifications
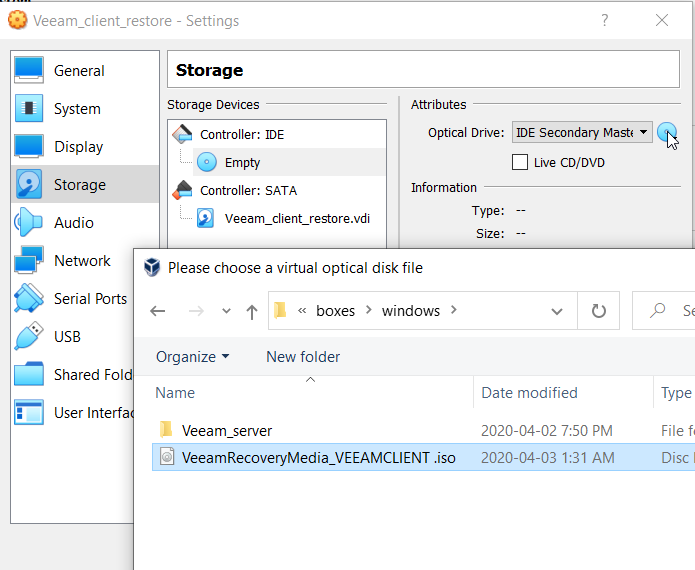
- Copy the ISO file to the Host machine and mount it into the vm’s DVD drive
- Boot the new virtual machine . We will be prompted with the following boot menu that gathers both Windows and Veeam Recovery tools. We will proceed by choosing Bare Metal Recovery on our new virtual machine.

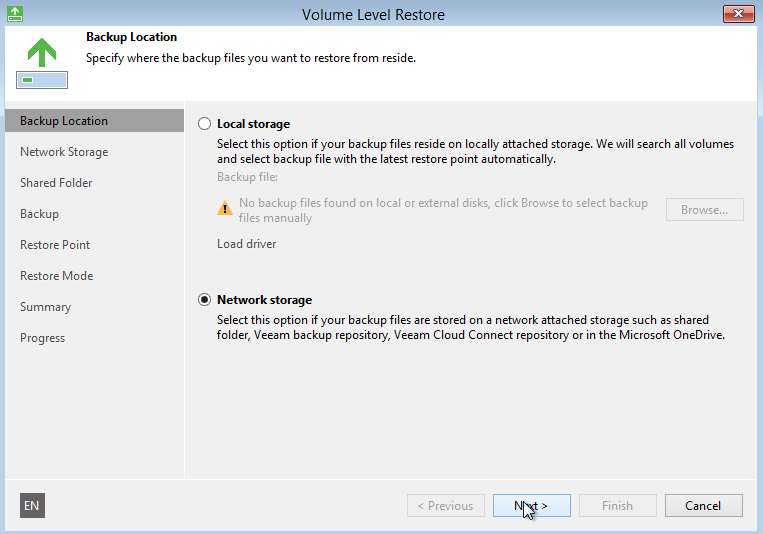
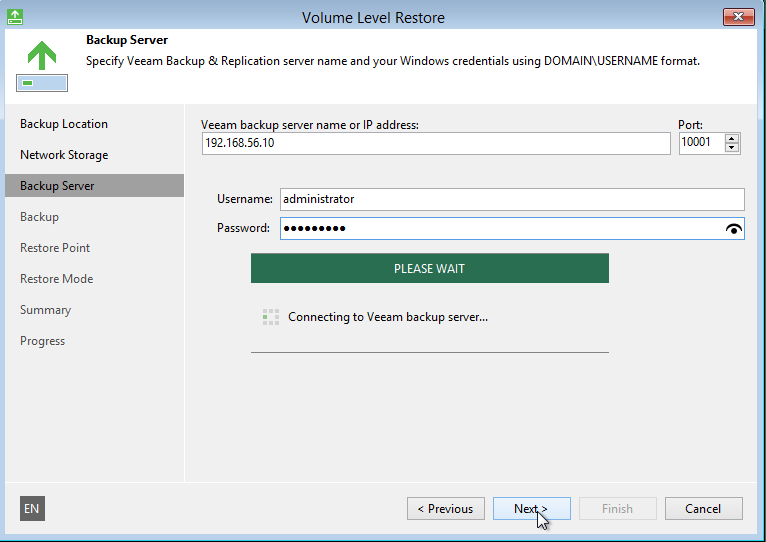
- Select network storage as our backup is located in the backup server repository
- Type the IP address and credentials of the Veeam backup server
- Select the last available backup

an error (Unable to auto-match disks)
- Select Entire computer as restore mode

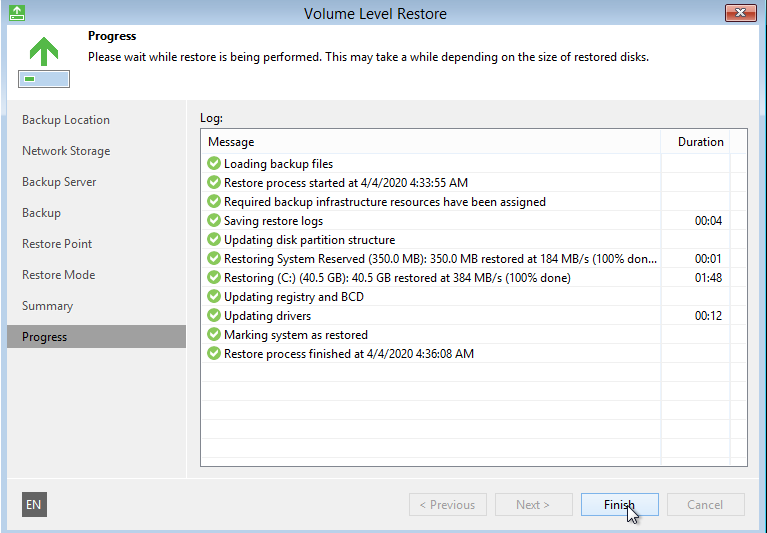
- After reviewing the summary click restore
- The Restore of 23GB Backup is done in only 2 minutes with an impressive I/O throughput
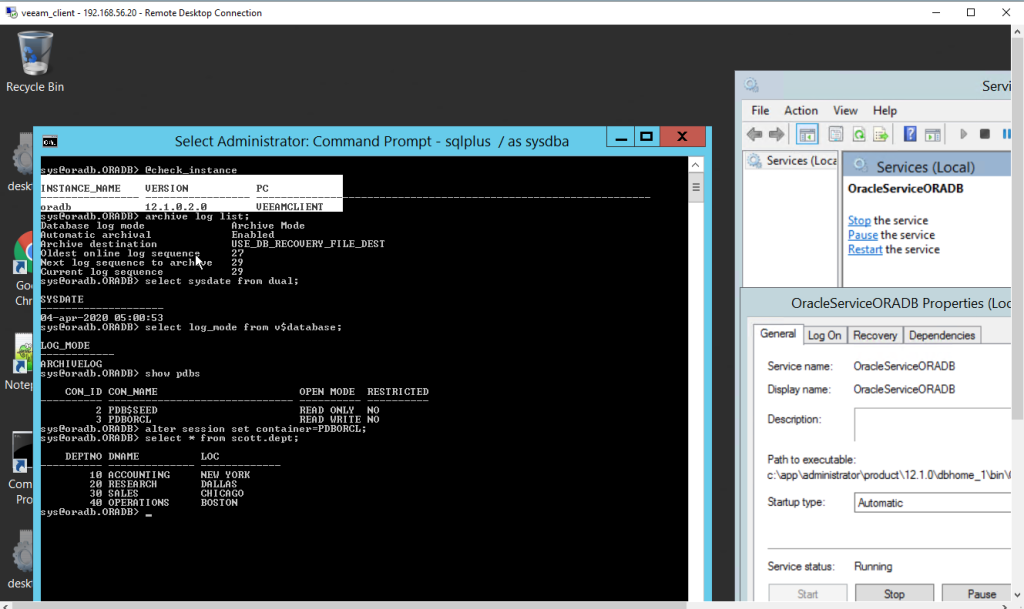
- Restart the new restored vm . Here I used an RDP session pointing to the original IP = 192.168.56.20 . After Ignoring the shutdown even tracker the database service is up and consistent (Archive mode on) .
Conclusion
Go to Top⭡
Furthermore the backup used in this lab incurred no downtime (hot backup) and the Application-Aware Processing feature coupled with Microsoft VSS technology guarantee a transactionally consistent backup for windows machines(Oracle/SQL server/sharepoint).
I have tried to deploy the Veeam agent for Linux the same way than for windows. However you will need to install both dkms and kernel-devel packages before deploying the agent (you might need help from Veeam support if issues arise).
# yum install dkms
# yum install kernel-uek-devel
No comments:
Post a Comment